Repair electric cooker. The electric cooker is the most common home appliance which has almost everyone’s home. So today here in this post I am going to tell you how you can repair an electric cooker at home. And if you Electric Cooker stops working? read this article to know the repair electric cooker.
Repair Electric cooker
Many types of errors or problems we get in the electric cooker. The main fault is that Stop working. This is the most common fault we get in almost every electric cooker. For repairing this fault you have to do the simple below steps in the cooker circuit.
First of all open the electric cooker and check all the basic connections. For example check Power Supply connection, Fuse situation good or bad, circuit burn, etc.
Problems Of Electric Cooker
- Power Problem: This means the cooker completely dead. To repair this problem you have to do check the main power supply. If your power supply is OK follow the next step. Here I only tell you the problem and in the below of this post, I will discuss how to fix all the Electric cooker problems.
- Stop Working: Stop working means Cooker is on but Induction coil not heating. Also, you can tell the temperature is not increase. This type of problem we get many times in an electric cooker. To repair this problem see the end of this post.
- E0 Problem: E0 problem means the sensor is not working and Induction Coin not getting heat. When any kind of electronics component getting damage and stop sensing the metal at that time we get this problem.
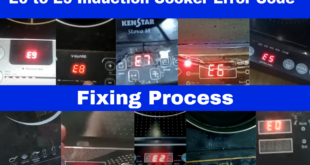
- Error Code: Error code means, every electric cooker has an error code that defines the particular problem. For example I already discuss the E0 problem which is the most common problem. And have many simile error codes like E1, E2, E3 to E12. All these error codes define different types of problems with different places.
- Induction Coin Not Heating: This problem also gets for power and circuit error.
Read this article to the end for a better understanding of how to repair an Electric cooker. And if you want to see a practical video of cooker repairing click here.
Electric Cooker Repairing Process
Open all the screws from the backside and remove the top cover very carefully and simply disconnect the metal sensor. After that check the main circuit for shorting and bad components. If you get any shorting and abnormal components then take the multimeter and check the below information. First of all, check the basic voltages from 220v AC. After that start checking these. If you want to learn electronics appliances repairing techniques click here.
- Main IGBT: IGBT is the main IC that is used to control the temperature of the Induction Coil. For repair, this just open and replace with a new one. This is the common IC easily available in the local market.
- 2 Main Capacitor: In the every Electric cooker have 2 capacitors, one is 0.33mfd 630v AC and 1200v DC. Another one is 5mfd AC 275v and DC 400v. After checking the capacitor you will get abnormal then replace it with a new one.
- Fuse: When you get no power in the cooker check the fuse if you get damage to replace it with a new one.
- Induction Coil: This is the most important part of the electric cooker. This coil getting damage very less amount. But unfortunately, if you get a bad coil to replace it with a new coil.
- Rectifier IC: Rectifier IC use for convert AC to Pulsating DC to control the circuit. After this IC we use a capacitor for getting pure DC. Many times we will get this IS in short condition. When the voltage will increase this IC will damage and stop working the circuit. This ic also very easily available in the local market.
I briefly discuss how you can repair an electric cooker in detail. Read carefully and apply in the field. Before applying this process you have enough knowledge about the electronics circuit reading technique. If you do not have this knowledge click here.


