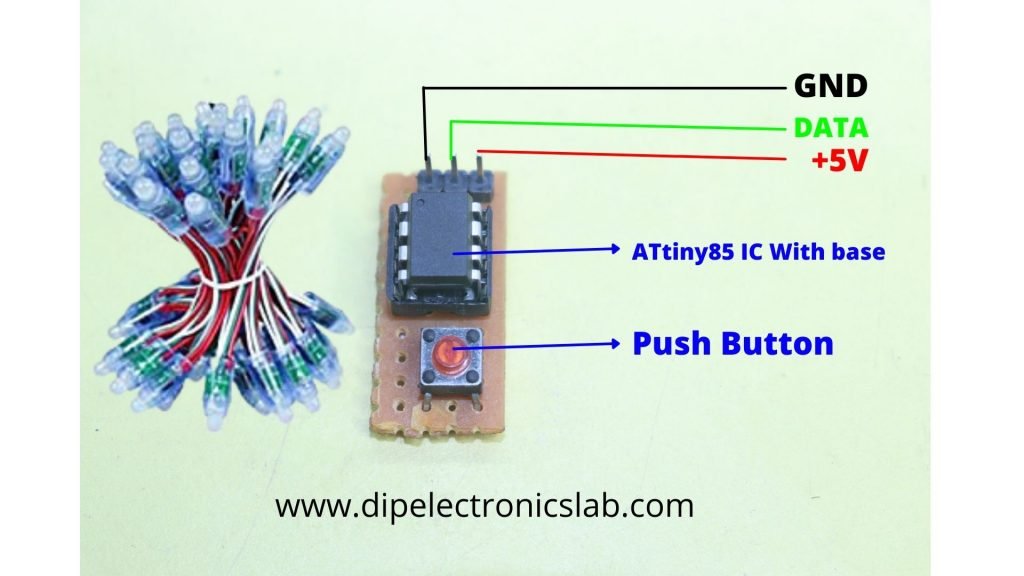
Hello and welcome guys today here in this post I will tell you how to make Pixel LED Controller Circuit at home at a very cheap price. If you going to make a pixel-led controller circuit and did not understand how to make it, read this post and know the process of pixel-led controller circuit making.
Here on this site, you will get Electronics related information and electronics project-making ideas. If you have an interest in electronics this site will help you a lot to learn electronics.
In the below block I have explained everything about how to make a pixel LED controller circuits at home step by step.
Needed components to Make Pixel LED Controller Circuit Board
Table of Contents
| SL NO | COMPONENTS NAME | BUYING LINK |
|---|---|---|
| 1 | VERO PCB | BUY |
| 2 | Male Header Pins 3Nos | BUY |
| 3 | Push Button 1Nos | BUY |
| 4 | 8pin IC Base | BUY |
| 5 | ATtiny85 IC | BUY |
Make Pixel LED Controller Circuit
First Step
Insert all the components inside the VERO PCB which I mention on the above block. I have attached the picture of inserted components into the VERO PCB. Just scroll down and see that picture.

Second Step
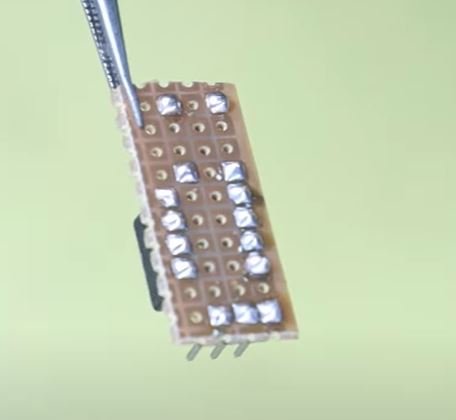
now in the second step, you have to solder all the components legs on the below layer. For better understanding, I have attached the soldered circuit in the below block. see and do the same thing in your project also.
Third Step
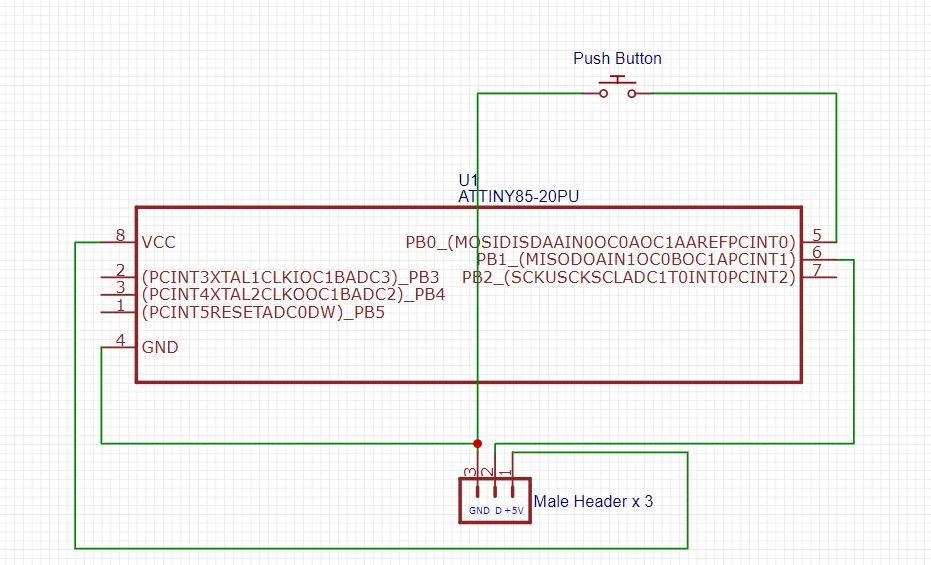
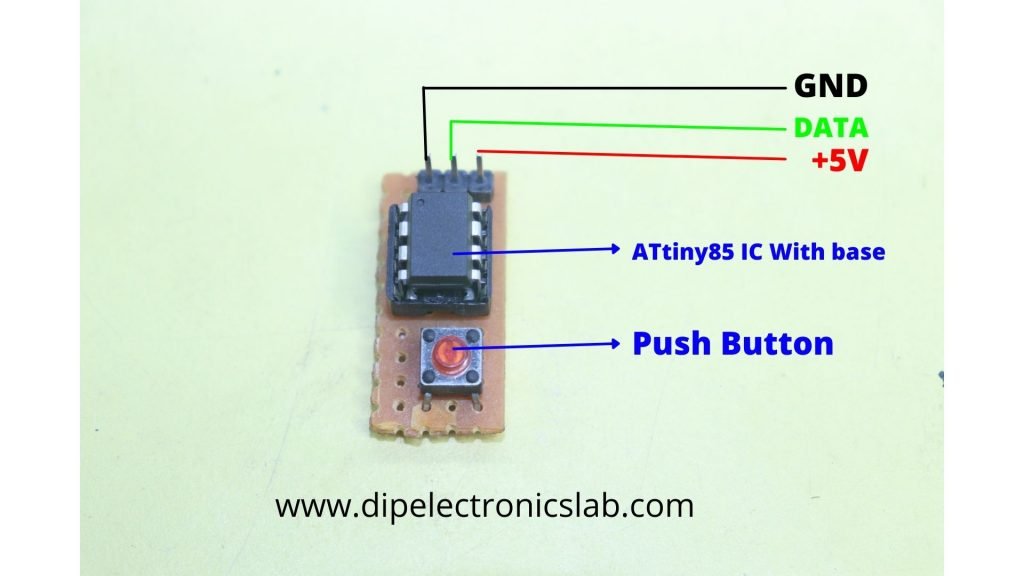
now in the tired step, you have to connect the components to each other according to the circuit diagram. I have attached two images where you will see the circuit diagram of the Pixel LED Controller circuit in one picture. And in another picture, you will see how looks like the Pixel LED controller Circuit after connecting all the components to each other.

Fourth Step
Now you have to upload the Pixel LED Controlling code on the ATtiny85 IC through the Arduino Uno board. I have explained How to upload code on ATtiny85 IC. And you will get the Pixel LED controller Arduino code below of this block. just copy the below code and upload it on your Attiny85 IC.
Before upload, the below code on ATtiny85 IC you have to install two library file one is FasrLED and the ANother Onel is Adafruit Neopixel
Click Gere to Download Pixel LED Controller Arduino Code
Fifth Step
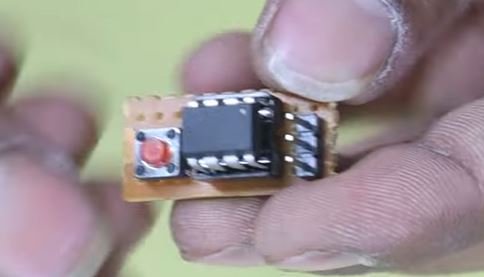
Now you have to do remove ATtiny IC from ATtiny IC Shield and insert ATtiny85 IC into the Pixel LED controller circuit 8Pin IC base according to the IC number. make sure to check the IC pins number before inserting the ATtiny IC into the IC base. I have attached the ATtiny IC inserting image in the below block
Final Step
Now you have to connect the Pixel LED and the power supply with the PIXEL LED controller circuit. In the below image I have shown you how you have to connect the pixelled and the power supply with this pixel-led controller circuit.
Now you can run your pixel LED with this Homemade Pixel LED controller circuit. If you have any questions and queries about this pixel-led controller circuit just comment down below. I will reply to you within 2 days.
Watch video on How to make Pixel LED controller circuit
Related Post of Pixel LED controller Circuit
- LCD LED Repairing guide Ebook
- How to make ATtiny Shield
- How to Upload Code on Any Attiny IC
- What is Bootloader in Electronics
- Best Android TV Box in India
- LCD LED Repairing Practical Video
FAQ of Pixel LED Controller circuit
pixel LED controller circuit diagram
Yes, you will get the pixel-led controller circuit diagram in this post. Also, you will get the complete guide to make pixel-led controller circuits at home.
DIY Pixel LED controller
Yes after reading this article you will be able to make a pixel-led controller circuit board very easily. If you want to make a pixel-led controller circuit board this post will help you a lot.
Pixel LED Controller Price
This is a very low-cost pixel-led controller circuit that you can make at your home. just read this post and implement all the steps step by step to make a pixel-led controller board at a very cheap rate.


Good information ….. This Article Help me ❤️🔥